DIY Chalkboard Camper Fridge

I knew before I bought this camper that I wanted to have a chalkboard fridge. I think it will be a lot of fun to write messages, notes, and for the kids to draw on. It was pretty easy to do, too! I taped off the edges with painters tape then taped up paper as well. I chose to do a spray can application rather than painting it on. I haven’t used the paint on kind from a can, so I can’t tell you which is better. But I have zero complaints so far (as I haven’t actually written on it yet)

I did three, really light coats. It’s better to do it like this, it looks splotchy after the first coat, but it will all cover after the next coats. You don’t want to have any runs, so take your time. I think the Rust-Oleum cans spray pretty easily. (I wasn’t paid to say that 😉 That’s just my opinion! You can wait about 20ish minutes between coats, but it says 24 hours before you can write on it

Pretty excited about this little project, let me know if you have any questions or if you’ve painted anything with this chalkboard paint! I’d love to hear from you 🙂

Rust-Oleum Chalkboard Paint

25

Chalk Painting Camper Cabinets

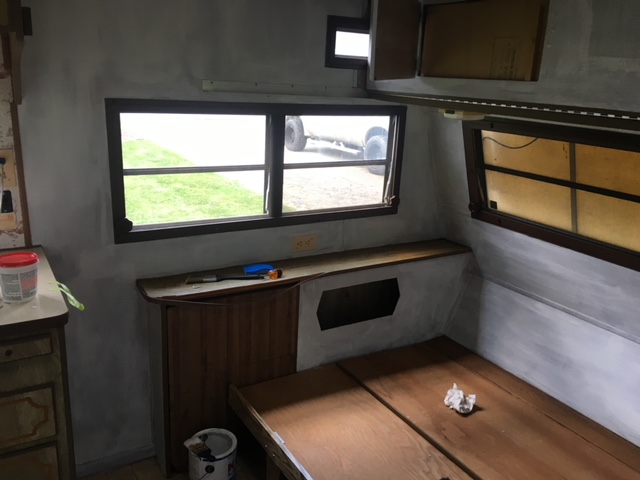
GOODBYE brown ugly cabinets!!!

I’ve been sooo looking forward to painting these cabinets. It took me awhile to figure out what color I wanted them. Part of me wanted to do something bold like yellow or blue, but I ended up with Paris Grey. Then I can do some funky curtains and pillows and be able to change them out when I’m ready for different colors, rather than having to repaint.

If you haven’t used chalk paint, it’s pretty straight forward. It’s hard to mess up. If you have some rough edges, you can lightly sand. However, as long as your cabinets are clean, you don’t have to do any prep-work by sanding or stripping them. After all, it’s a camper and it doesn’t have to be perfect! Any brush will do, I’ll link a couple at the bottom of this post with my favorites. I do have some of Annie Sloan’s brushes, and while I love them!.. You don’t need to spend that much money on them for a one time use of camper cabinets. It dries incredibly fast, you could paint both coats if you have to. Just let them dry a bit in between to cure. I like to wait a couple days and then wax. So it hardens up. Waxing isn’t difficult, it’s just time consuming.

Waxing:

This can be done a couple different ways, and I feel like everyone has their own technique. You can use a wax brush: dip it into the can, swirl it around on the lid a bit to even out your brush, then go in circular motions to cover over the paint. You’ll be able to see where you’ve already applied it. Once you have a good section covered, take a soft rag, or a Blue Shop Towel and ‘buff’ the wax. Basically you just rub out in circles or up and down motions. It seems as though you are wiping all the wax off, but you’re smoothing it all out and making sure it’s even. You can also do this same process with a cheese cloth (one to dip into the wax, then a clean one to buff)

I painted over the hinges, but not the handles

I like to buy my paint from The Purple Painted Lady, she ships super fast and decorates the box really cute 🙂 I like the little details. She also sells Annie Sloan paint brushes

Click HERE for the paint I used

Click HERE for the wax I used

shop towelsBlue Shop Towels

Purdy 2in Paint Brush

Cheesecloth for waxing

Priming The Walls For Paint

An important step to painting the walls is the prep! After taking down all the curtains, I lightly sanded over the holes. When you take the screws out it pulls up the wood a bit, so if you go over with sandpaper it will smooth it out. Then take a little bit of wood putty and fill in the hole. If you wipe over the hole with either your finger or a paper towel, then you don’t have to go back and sand over each hole. At the end of the day, it’s an old camper and it doesn’t have to be perfect – which is easier said than done if you are a perfectionist like me 😉

This step isn’t necessary, you can hang things up or put curtains back in the same spots if you don’t want to fill in the holes

What is necessary though! Is wiping down the walls and making sure they are clean and free of dust from sanding. You won’t want to use anything that will leave behind a residue. So the vinegar mixture would be good, or my personal favorite is Shaklee’s H2 cleaner. It’s an organic – all purpose cleaner that doesn’t leave behind chemicals or residue (which means my kiddos can help clean. win. win)

Once you have your walls ready, you’ll want to do a coat of primer. I used Kilz Primer. It has a mildew resistant layer which is nice in a camper. You can brush it on or use a small foam roller. I’ll add some links at the bottom of this page so you can see what tools I used

There are a lot of different options for primers, I just happened to have a gallon of this on hand and I read good things about it for campers

This step sure doesn’t look pretty, but it really brightens it up already! I can wait to get the actual paint rolled on!!

img_6461img_6464img_6465


Here’s what I used:

Kilz Primer

My favorite brush (seriously, gotta have one of these)

 wooster brushWooster Brush


paint rollerpaint tray and roller

wood filler.jpg I like this wood filler because it turns white when it’s dry


sand block.jpg A sand block makes it easy to go over all the screw holes or died putty. Plus the handle is nice and squishy 😉 you can buy sandpaper already cut to size, or cut down large sheets to fit.

Tack Cloths are also nice to have on hand if you have to do a lot of sanding